Texture painting
Table of contents
Shortcuts
| Shortcut | Info |
|---|---|
| Right click | in Image Editor > Paint mode to get quick access to brush modes |
| F | to quickly resize brush |
| Shift+F | to change brush strength |
| Right Click | using a brush to quickly access the brush modes |
Draw tool
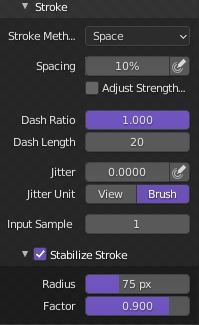
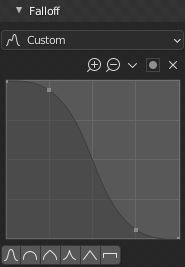
Don’t be afraid to check out the various brush settings in the N panel. In Stroke, you can change the stroke method to a straight line for example. You can also add “lazy stroke” a.k.a Stabilize Stroke. In Falloff, you can change the general shape of the strength falloff: hard edges vs soft edges.
Smear tool
I use the smear tool religiously as a way to blend colours and create gradients. If you’re getting lag, you can turn off Anti-Aliasing in the N panel in the Tool tab.
Masking
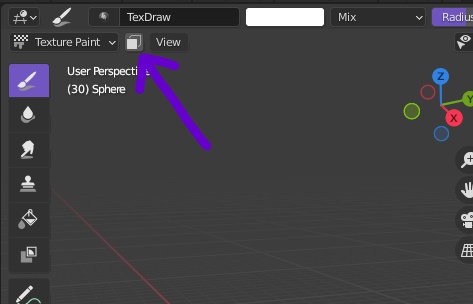
I tend to stick to painting on the flat UV texture view, but sometimes I need to paint directly on the model. To avoid painting on the wrong sections, go into Edit mode and select the faces you want to affect. Go back to Texture paint mode and click the Paint Mask button. Now you can only paint on the select faces!
Ucupaint
I first learnt Blender texture painting using the default Blender functions. However, I feel that Ucupaint is so good for mimicking traditional layer-based drawings apps. I highly recommend using it when you need to hand paint textures. It can also be used on more advanced materials but I have personally not used it for this.
To set up Ucupaint once it’s installed, click on an object then click on the Ucupaint tab in the N panel. Click on Quick Ucupaint Node Setup, select Emission and click OK. You now have one channel (the base colour) and no layers.
You can add layers in the Layers section by clicking the + sign. You can then choose to create an image, pick an existing image or choose any of the other premade images.
If you create an image, you can name it, choose the resolution (I usually go for 2048 x 2048), and uncheck Use Image Atlas. If you need more info on that, check here.
You can then texture paint as normal, and through the Ucupaint interface you can change the blend mode, add masks, change opacity, reorder layers… Go wild!