Modelling
Table of contents
Shortcuts
These are not the basic shortcuts (such as G, S, R), so if you are learning Blender, make sure you know the basics first. I’ve listed these here because they are shortcuts I use a lot, or struggle to remember.
| Shortcut | Info |
|---|---|
| Ctrl + 1 (2, 3…) | in Object mode: to subdivide once (Ctrl + 2 twice etc.) |
| / | to isolate mesh |
| numpad . | to focus on selected |
| Alt+Q | with the mouse hovering over another object to swap to that object’s Edit mode instantly |
| After pressing G, S or R, you can press an axis key twice (e.g. ZZ) | to transform based on the local axis instead of global |
| Alt+D | to clone duplicate |
| Alt+E | for more extrude types |
| Ctrl+R loop cut, then E to snap, then F | to make the loop cut parallel to existing top or bottom loops |
| Select two faces spaced out > press + on numpad | to extend selection in an alternating pattern |
| J | after selectin two verts (instead of F) to knife between two verts |
| Shift+Ctrl+B | on a vert to do fancy bevel stuff |
| Shift+Ctrl+Alt+S | for shearing rotation (avoid cylinder squash) |
| Shift+W | bending |
| Alt+B and drag | to hide part of an object in Object Mode |
| F3 | to search for any command in Blender! |
Settings and add-ons
- Inbuilt add-on: “Add Mesh: Extra Objects” for Roundcube mesh (Object Mode: Shift+A > Mesh > Roundcube).
- Inbuilt add-on: “Mesh: LoopTools” for Loop Relax and Loop Circle (Edit Mode: N panel > Edit > LoopTools).
- Edit > Preferences > Keymap > 3D View > Check Tab for Pie Menu - this is entirely up to preference but I like being able to access any mode with just one button.

Using image references in Blender
- Press 1 on numpad to snap to the front facing view, then go to your file browser and drag the image directly onto Blender.
- In Object Data Properties, you can change it so that you can only see the image from the front, or back. You can also make it only visible in Orthographic view, and change the opacity.

General modelling tips
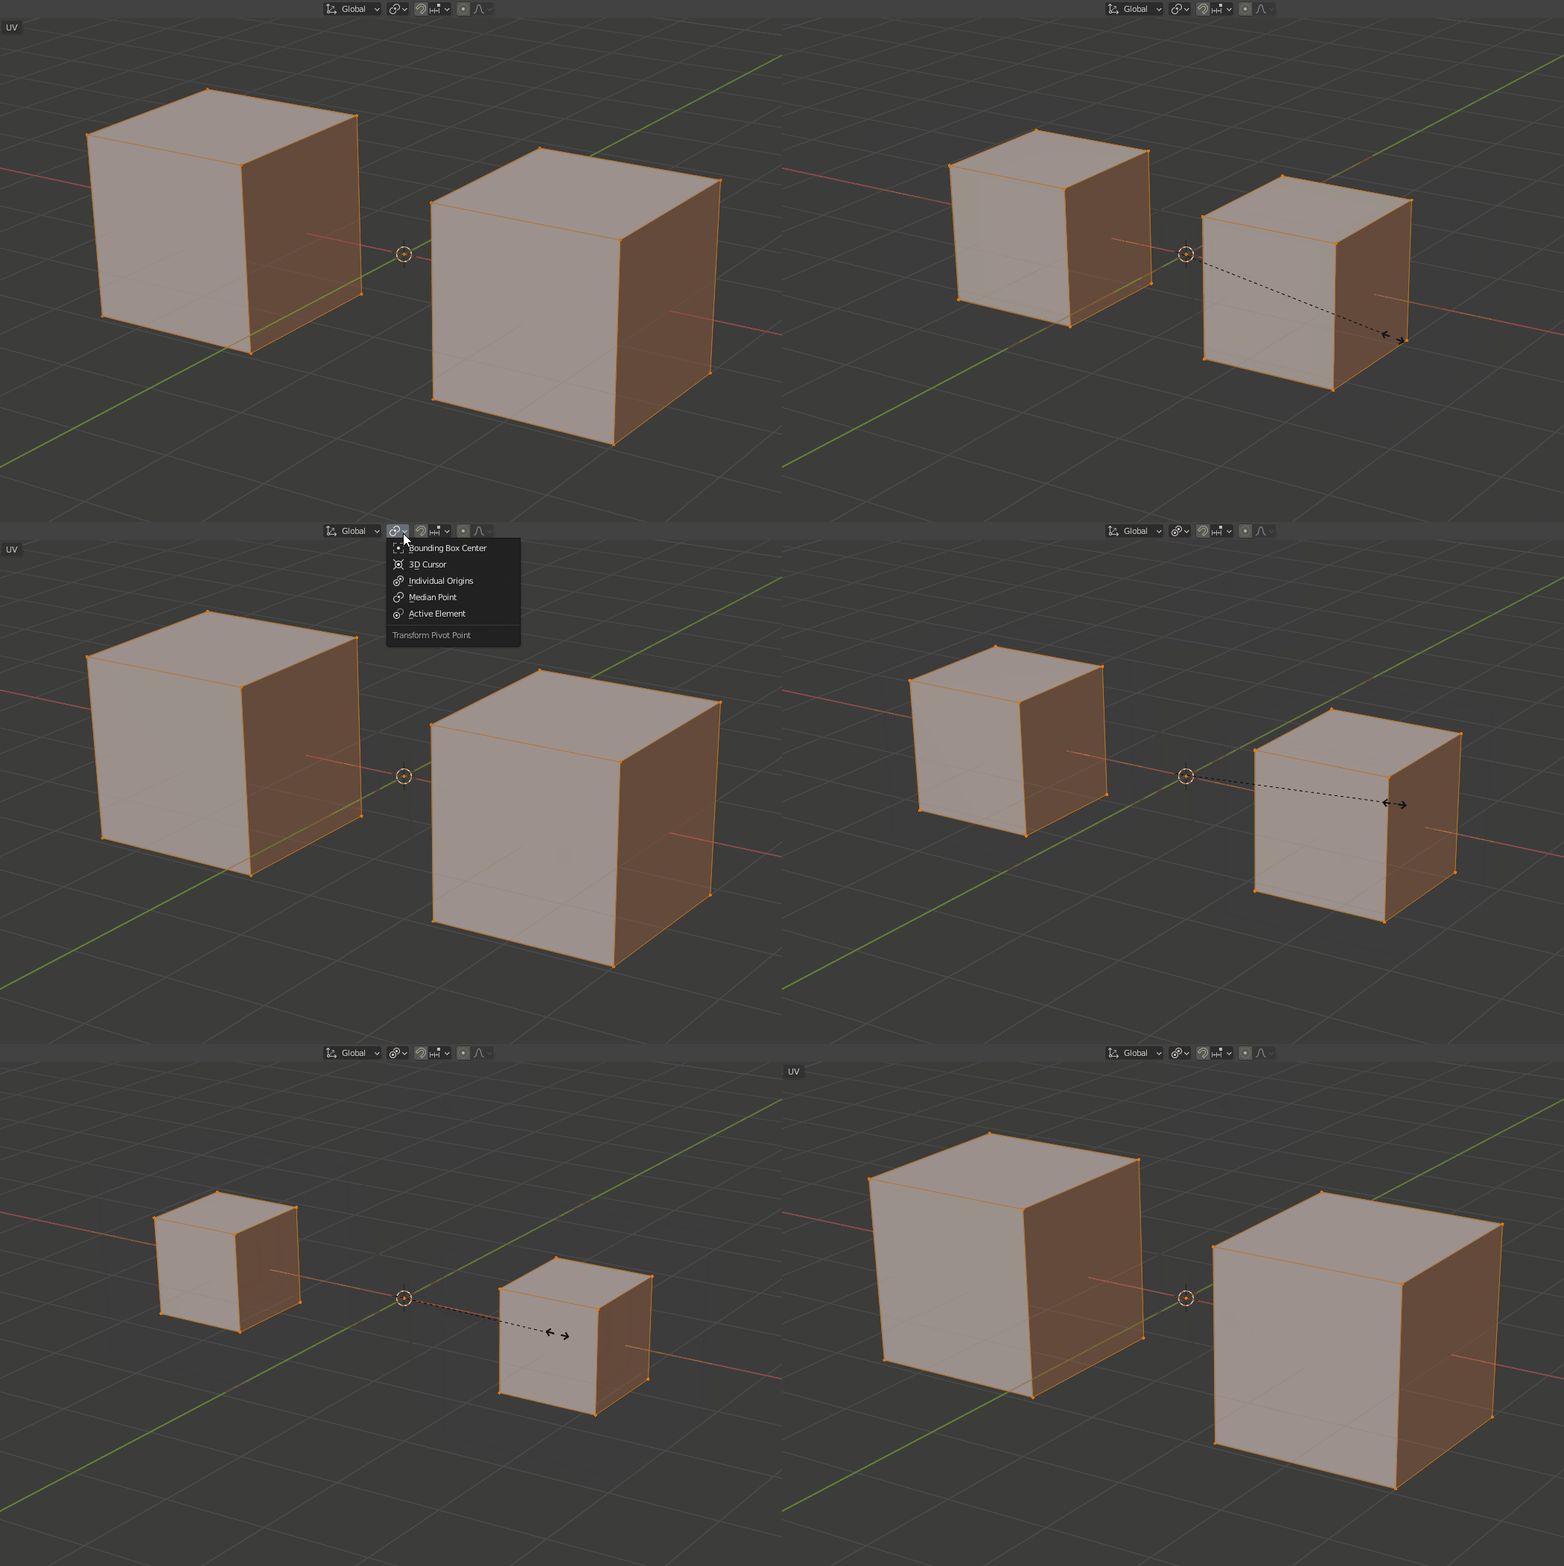
- Changing pivot points: Individual origins often comes in handy when transforming multiple meshes. In this clip, I show the use of Individual Origins vs Median Point on two cube meshes.

Hair curves
Coming soon