Rendering
Table of contents
Shortcuts
| Shortcut | Info |
|---|---|
| Ctrl + 0 | to assign selected camera as render camera |
| F12 | to Render image |
| Ctrl+F12 | to Render animation |
Settings
My settings are the following: (I have a 3060Ti)
Render Properties:
Render Engine:Cycles(you can use Eevee but this will change other available settings).Device:GPU Computeif you have a better GPU than CPU.Sampling: increase theRender samplingif you want.Denoising: checkRenderand selectOptiXif available.Film: CheckTransparentif you need transparent backgrounds.Performance:Tiles: increase to 256px.Color Management: make sureView Transformis set toStandard.
Output Properties:
Dimensions:ResolutionX and Y: 2048 px.Output: File format:PNGfor images,PNGorFFmpegfor animations .- PNG animation frames will have to be stitched back together later but if Blender crashes during rendering, you won’t lose the already rendered frames.
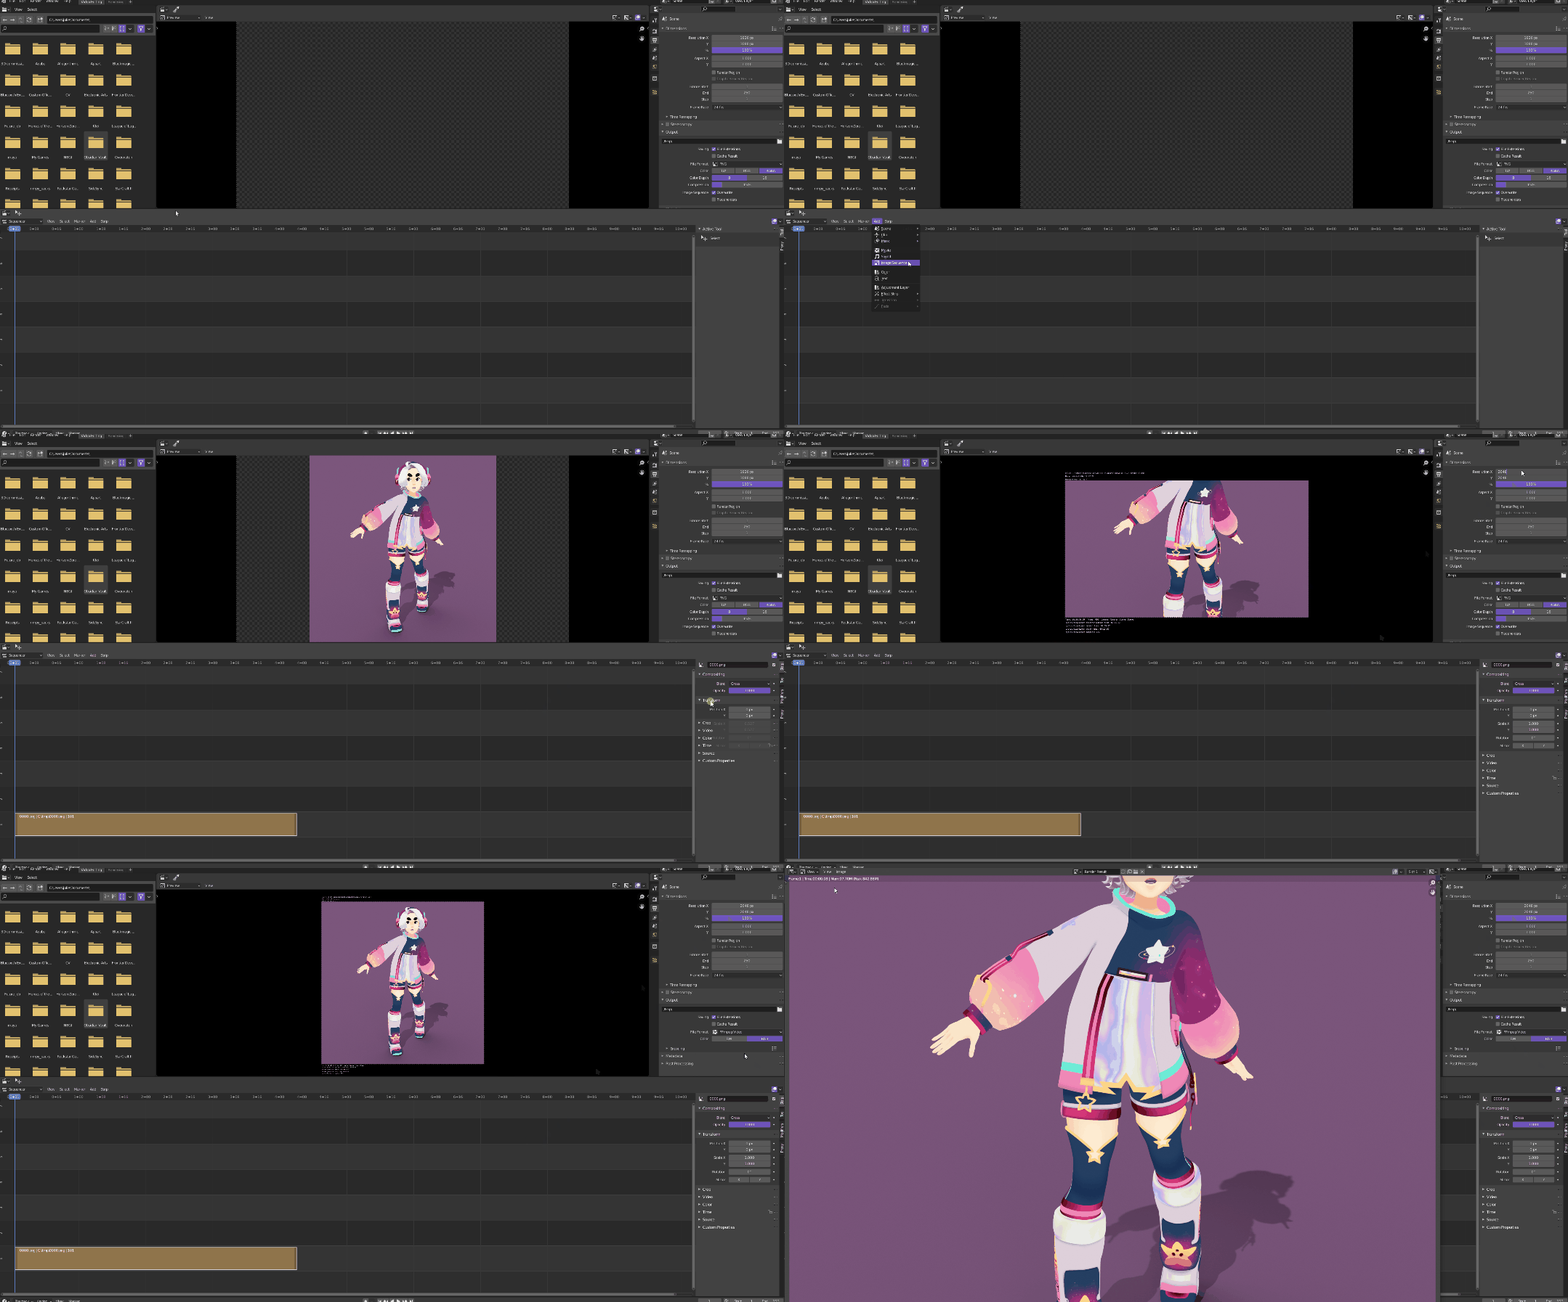
Stitching PNG sequence to video
- File > New > Video Editing.
- In the Sequencer, click
Add>Image/Sequence. - Select all your PNGs (press
Ato select all) (this step is skipped for privacy reasons in the gif below). - On the right, open Transform and set the
ScaleX and Y to 1. - Change the
Dimensionsto fit, and the n. of frames. - In
OutputchooseFFmpeg. - Render Animation (
Ctrl+F12) (you can use Eevee for this).
Turnaround camera
Using the inbuilt add-on Animation: Turnaround Camera:
- Add a camera.
- Select an object to be the focus of the camera.
- Go to
Npanel >Animate. - Change the
End frame(you can set it lower, somewhere between 60 and 150 for example). - Click
Turnaround. - In Output properties, you can keep PNG or switch to FFmpeg if you don’t want to have to stitch together the PNGs afterwards.